

Excelを読み書きするAnsibleモジュールとフィルターをAnsible Galaxyで公開してみた

はじめに
ITソリューション部の水谷です。
前回と前々回の記事で、AnsilbeからExcelファイルの内容を読み込むフィルタープラグインや、Excelファイルの読み書きを行うモジュールを作ってみました。機能的にはたいしたものではないですが、それなりに需要があるものかもしれないなと思いましたので、Ansible Galaxyで公開してみようと思いました。
そこで、今回は自作のコレクションをAnsible Galaxyで公開するまでの流れを書いてみたいと思います。
リポジトリの準備
まずは、ソースコードの公開と、コミュニティからのフィードバックを受けるために、コレクションをGitHubに登録したいと思います。Ansible Galaxyに登録するために必ず必要というわけではないですが、今後より良いものに育てていくにはチャンスが得られるので、公開したほうが良い判断しました。
せっかくなので(?)新しいGitHubアカウントを作成しました。アカウント名を 'yumizu11' としましたので、コレクションのnamespaceもこれに合わせて、yumizu11.excelに変更しておきます。
続いてPublicのリポジトリ 'excel_collection' を作成します。
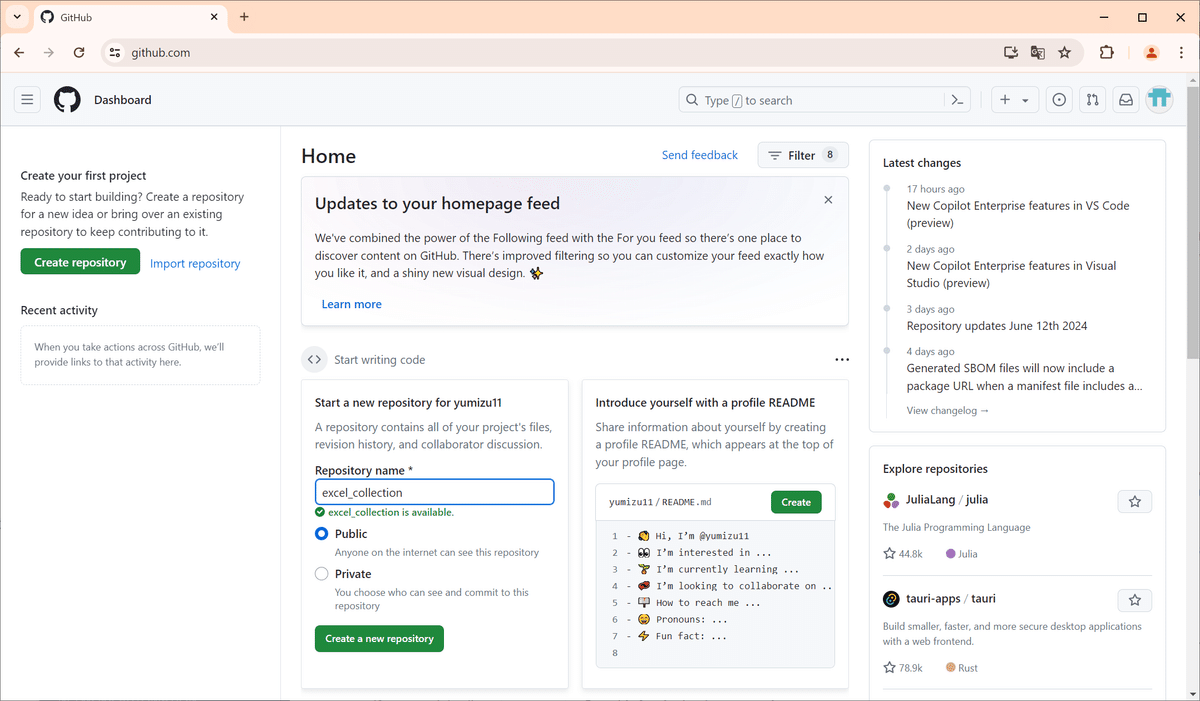
リポジトリのトップに配置するREADME.mdを用意して、あとはライセンステキストも作成しておきます。

コードの整理
Ansible Galaxyで公開するにはいくつか準備が必要なのですが、まずはコードを整理して、少しクオリティを上げたり、(コード内に)ドキュメントを追加していきます。
機能的な変更は以下のようなものを行いました。
Excel読み込みモジュールの範囲指定を 'A1:B2' 形式でできるようにする
Excel読み込み時にヘッダーに同じ名前があった場合にsuffixを付与する
Excel書き込みで行を追加する際の冪等性の考慮
各種エラーチェックの追加
これらについて本記事では書きませんが、もしご興味がありましたら上記GitHubでコードを確認してください。
続いてコード内のドキュメントですが、これはAnsible Galaxy側で決められているいくつかの文字列変数に書いていきます。その内容がそのままAnsible Galaxyのページやansible-docコマンドで表示されることになりますので、英語でしっかり書いておきたいところです。
1つ目は DOCUMENTATION 変数で、ここにモジュールの説明や作者名、パラメーターの説明などをYAML形式記述します。
下はread_sheetモジュールの例です。
DOCUMENTATION = '''
---
module: read_sheet

short_description: This module read Excel file and return cell values

version_added: "0.1"

description:
    - "This module read a specified sheet in an Excel file (.xslx), and return rows of cell values, or map if the 1st row is header line. You can specify the range of cells to read."

options:
    path:
        description:
            - Path to the Excel file you want to read
        required: true
    sheet:
        description:
            - Name of sheet you want to read. The default is the 1st sheet in the Excel file
        required: false
    range:
        description:
            - Range of cell to read. This range is Excel style range, like 'A2:E5'. 'B2:' means starting with B2 to the end.
        required: false
    startrow:
        description:
            - Row number to start reading from. The default is 1. If range is specified, this param will be ignored.
        required: false
    startcolumn:
        description:
            - Column number to start reading from. The default is 1, meaning A.  If range is specified, this param will be ignored.
        required: false
    endrow:
        description:
            - Row number to finish reading. The last row in the sheet if not specified.  If range is specified, this param will be ignored.
        required: false
    endcolumn:
        description:
            - Column number to finish reading. The last column in the sheet if not specified.  If range is specified, this param will be ignored.
        required: false
    header:
        description:
            - Specify 'true', if the first row is the header line. The default is 'false'
        required: false

author:
    - Yuichi Mizutani (@yumizu11)
'''
続いて、使用例を EXAMPLES 変数に書きます。
下は同じくread_sheetモジュールのものです。
EXAMPLES = '''
# Read a whole rows of the 1st sheet
- name: Read whole rows
  yumizu11.excel.read_sheet:
    path: mysheet.xlsx
  register: sheet_rows

# Read the specified sheet
- name: Read whole rows of mysheet
  yumizu11.excel.read_sheet:
    path: mysheet.xlsx
    sheet: mysheet
  register: mysheet_rows

# Read specified range of cells
- name: Read B2 to D5
  yumizu11.excel.read_sheet:
    path: mysheet.xlsx
    startrow: 2
    endrow: 5
    startcolumn: 2
    endcolumn: 5
  register: sheet_b2_d5

# Read specified range of cells
- name: Read sheet with header in the 2nd row
  yumizu11.excel.read_sheet:
    path: mysheet.xlsx
    startrow: 2
    header: true
  register: sheet_rows
'''
最後はモジュールの戻り値の説明を RETURN 変数に書きます。
RETURN = '''
rows:
description: List of rows read in the sheet. Each row has list of cell values. You can access cell value directly with rows[row][column].
type: list
returned: always
path:
description: The path to the Excel file the module read
type: str
returned: always
sheet:
description: Sheet name the module read
type: str
returned: always
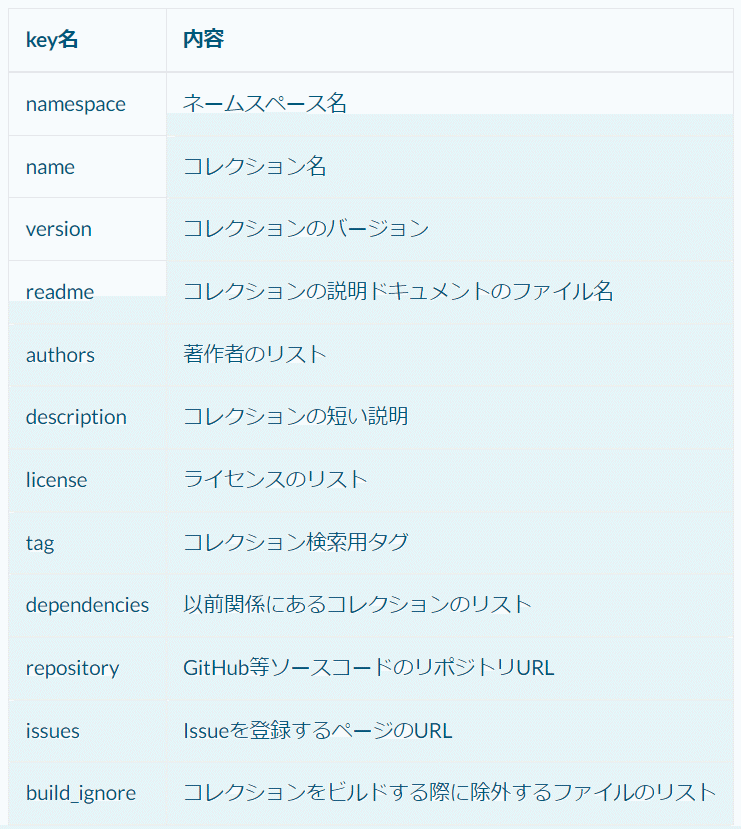
'''続いて、コレクションのマニフェストファイルにあたる galaxy.yml を編集するのですが、このファイルにはコレクションの以下の情報を記述することになっています。
この時点でライセンスをどれにするかを決めておく必要がありますね。今回はMITライセンスとします。
あと、もう1つ必要なのが、requirements.txtの準備です。
このファイルにコレクションが使用するPythonライブラリを列挙しておくと、コレクションをインストールする際にPythonライブラリも合わせてインストールしてくれます。
今回は openpyxl のみなので、それを書いておきます。
コレクションのビルド
ファイルの準備ができたら、ansible-galaxyコマンドをbuildオプションで実行してビルドします。これでコレクションが1つのtar.gzファイルにまとまります。
$ ansible-galaxy collection build excel
Created collection for yumizu11.excel at /mnt/c/Projects/note/excel_collection/yumizu11-excel-0.1.0.tar.gz
$ ls
LICENSE.txt  README.md  excel  yumizu11-excel-0.1.0.tar.gz
ということで、yumizu11-excel-0.1.0.tar.gz ができました。
インストールできるか試してみます。
$ ansible-galaxy collection install yumizu11-excel-0.1.0.tar.gz
Starting galaxy collection install process
Process install dependency map
Starting collection install process
Installing 'yumizu11.excel:0.1.0' to '/home/mizutani/.ansible/collections/ansible_collections/yumizu11/excel'
yumizu11.excel:0.1.0 was installed successfully

$ ansible-galaxy collection list

# /home/mizutani/.ansible/collections/ansible_collections
Collection                               Version
---------------------------------------- -------
yumizu11.excel                           0.1.0

# /usr/lib/python3/dist-packages/ansible_collections
Collection                               Version
---------------------------------------- -------
amazon.aws                               7.6.0
ansible.netcommon                        5.3.0
ansible.posix                            1.5.4
...
問題なくインストールできたようですね。
Ansible Galaxyへの登録
GitHubにログインしている状態でAnsible Galaxyのページ にアクセスすると、自動的にGitHubのアカウントでログインされます。
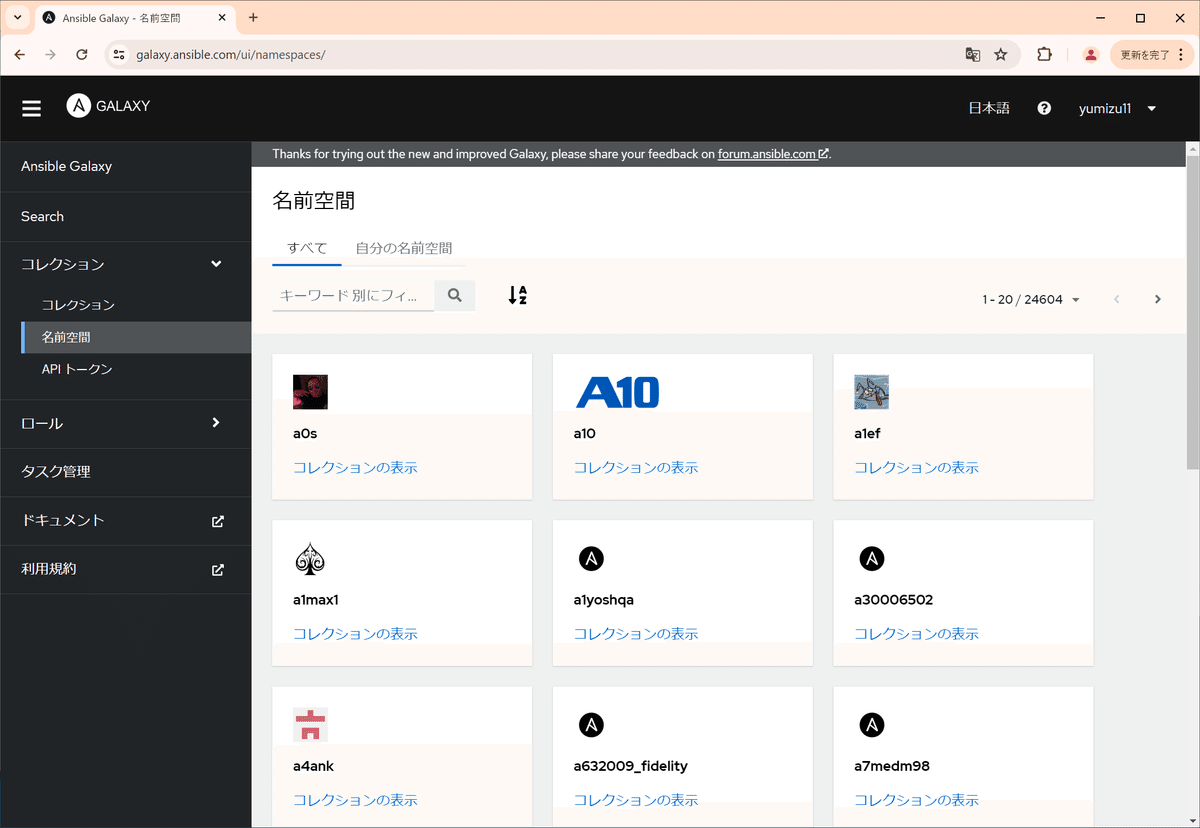
左メニュー「コレクション」→「名前空間」で自分のユーザー名で検索すると、自分の名前空間にたどり着きます。
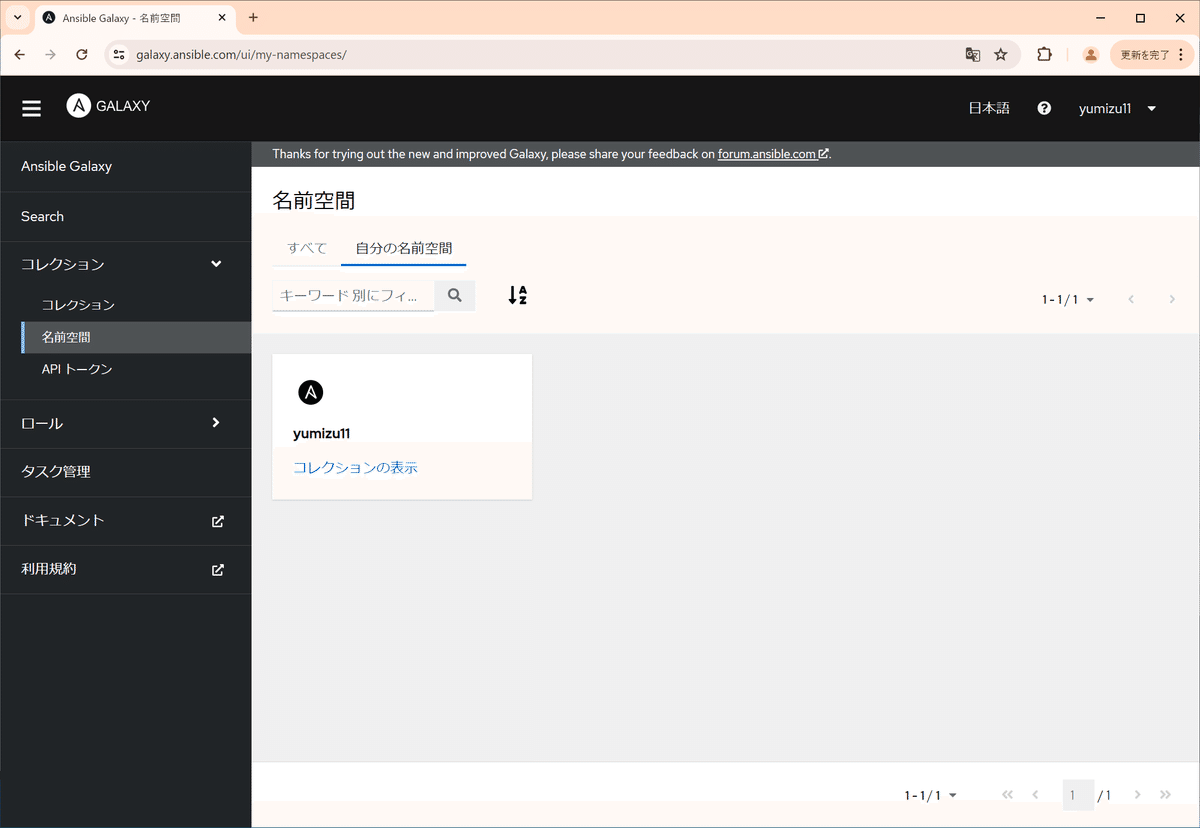
この時点ではまだ1つもコレクションを登録していないので、空っぽですね。
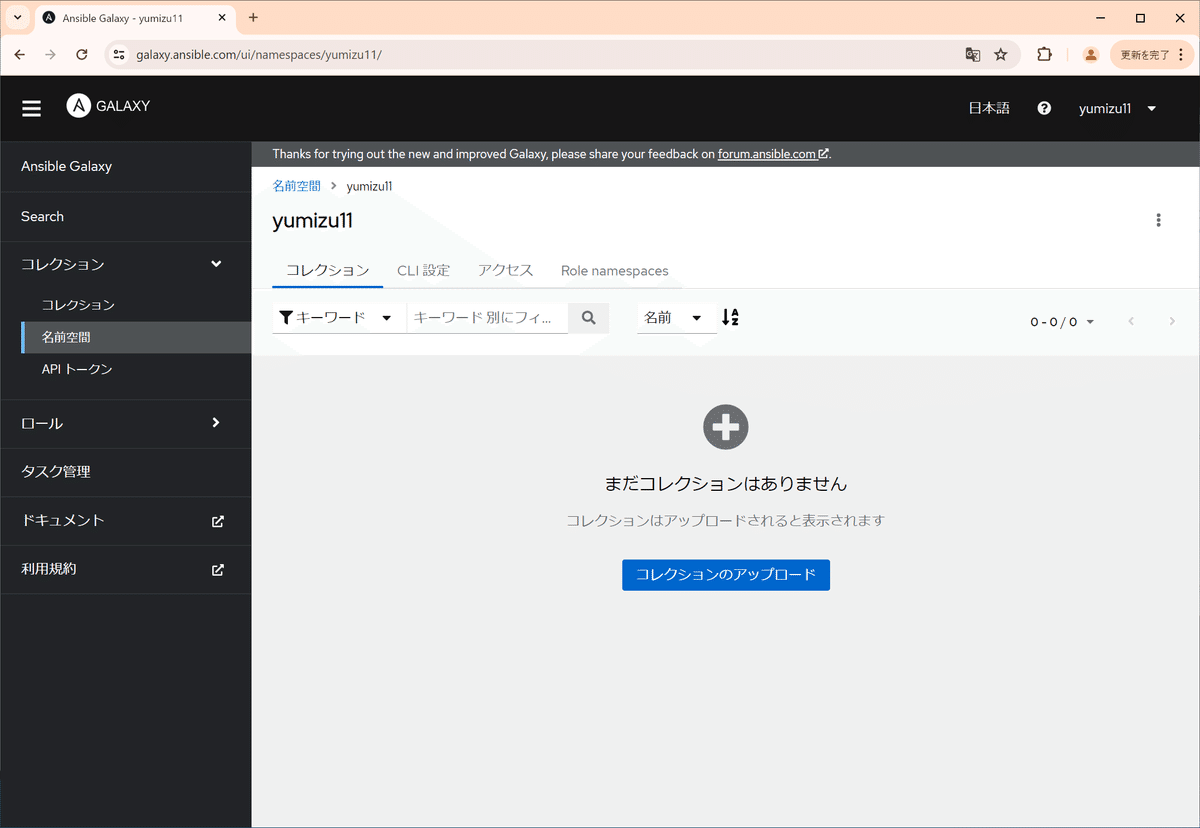
ここで、「コレクションのアップロード」ボタンをクリックします。
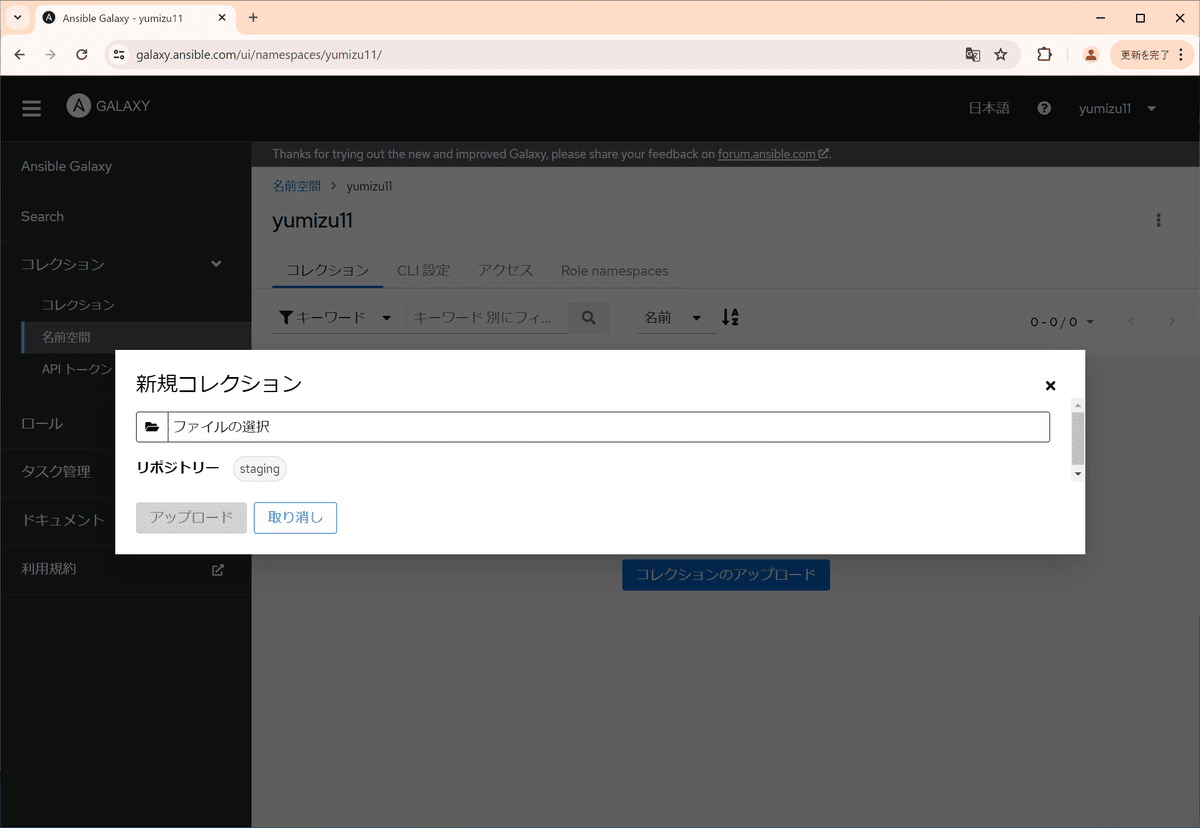
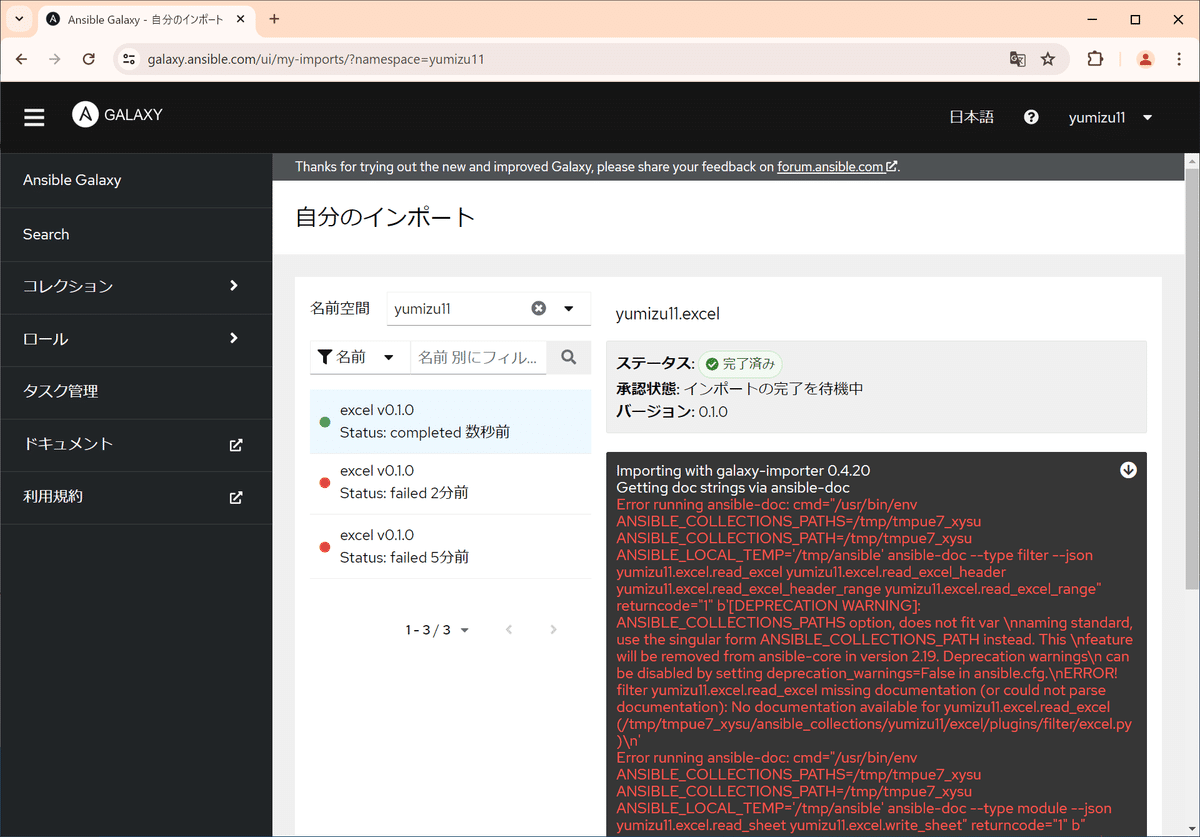
しばらくするとアップロードしたtar.gzファイルを検証して、自分の名前空間に登録してくれます(ちょっと不備があって2回失敗しましたがw)。
これでAnsible Galaxyへの登録は完了し、世界に向けて私のコレクションが公開されました!
最後に
英語でのドキュメント作成はちょっと手間がかかりますが、Ansible Galaxyへのコレクション登録自体はそれほど難しくないことが分かっていただけたかと思います。
皆様ももし良い自作ロールやモジュール、あるいはフィルターをお持ちでしたら、Ansible Galaxyに登録してみてはいかがでしょう?
自己満足ではありますが、コミュニティに貢献しているという満足感は、実際にコレクションを公開している人のみのものだし、そこから生まれるインターナショナルなコミュニケーションもきっと楽しいものになると思います。
執筆者プロフィール:水谷 裕一
大手外資系IT企業で15年間テストエンジニアとして、多数のプロジェクトでテストの自動化作業を経験。その後画像処理系ベンチャーを経てSHIFTに入社。
SHIFTグループ会社「RGA」および「システムアイ」に出向し、インフラ構築の自動化やCI/CD、コンテナ関連の業務に従事した後、2024年3月よりSHIFTのインフラサービスGに配属。
LinuxよりWindowsの方が好き。
IaC支援サービスのご紹介
SHIFTではTerraformやCDKを使ったクラウドインフラ構築の自動化や、Ansibleを使ったサーバOSの設定自動化や構成管理のご支援も行っております。ご依頼・ご相談は下記リンクからお願いします。
お問合せはお気軽に
https://service.shiftinc.jp/contact/
SHIFTについて(コーポレートサイト)
https://www.shiftinc.jp/
SHIFTのサービスについて(サービスサイト)
https://service.shiftinc.jp/
SHIFTの導入事例
https://service.shiftinc.jp/case/
お役立ち資料はこちら
https://service.shiftinc.jp/resources/
SHIFTの採用情報はこちら
https://recruit.shiftinc.jp/career/
PHOTO:UnsplashのRubaitul Azad